
Professional exterior paint preparation is the process of inspecting, cleaning, repairing and stabilizing the outside surfaces of a home before the finish coating is applied. For Calgary properties, that usually means evaluating existing paint adhesion, removing chalk and loose material, correcting appropriate surface damage, assessing joints, selecting primer only where the substrate requires it, and waiting for suitable drying and weather conditions.
That definition sounds straightforward. The difficult part is that a house is rarely one uniform surface. South-facing siding can be powdery and sun-damaged while shaded stucco remains damp, cedar trim shows tannin staining, and a metal garage door needs a completely different preparation system. Applying the same process to all four is how an attractive repaint turns into premature peeling.
This guide is the dedicated exterior chapter of our complete professional paint preparation guide. It explains the preparation decisions made before an exterior coating goes on. Our Calgary exterior painting service page covers the actual project scope, surfaces and estimate process.
What should happen before an exterior house is painted?
A properly prepared exterior should be inspected by elevation, cleaned according to the material, allowed to dry, cleared of loose coating, repaired where appropriate, caulked only at suitable joints, selectively primed, protected and checked against the coating manufacturer's weather requirements. The precise order can vary with the substrate, repair product and primer system.
- Identify every surface and the condition of its existing finish.
- Protect windows, landscaping, adjacent materials and access areas.
- Remove dirt, chalk, contamination and unstable material safely.
- Allow the substrate to dry sufficiently for the specified system.
- Repair defects that belong within the agreed painting scope.
- Prime exposed or adhesion-sensitive surfaces where required.
- Address appropriate paintable joints without blocking drainage.
- Confirm surface temperature, weather, coating compatibility and cure time.
The essential sequence behind every decision remains preparation → adhesion → finish → longevity. A second finish coat does not compensate for a first layer that was applied over dust, moisture or a failing older coating.
Why Calgary exterior preparation needs an elevation-by-elevation assessment
Calgary and Airdrie homes deal with strong sun, windblown grit, spring moisture, summer hail, sudden temperature changes and repeated freeze-thaw movement. Those conditions do not strike every side of the house equally. An estimate that treats the front, back and both sides as identical can miss the areas most likely to fail.
South- and west-facing elevations often show greater fading, surface erosion and chalking. Sheltered north-facing sections can hold moisture longer after rain. Window corners, roof transitions, downspout discharge areas and lower wall sections deserve separate attention because staining or repeated coating failure may point to a condition paint alone cannot correct.
Neighbourhood construction also varies. One Calgary home might combine older cedar, painted stucco and a metal garage door. Another in Airdrie, Cochrane or Chestermere may have engineered siding, exposed trim and a windy, open elevation. The right approach follows the actual building, not a generic calendar or one-product promise. For a closer look at movement and weather exposure, see our guide to Alberta freeze-thaw cycles and exterior paint.
The exterior surface-readiness scorecard
Use this field guide during an exterior walk-around. It is a screening tool, not a structural assessment, laboratory adhesion test or substitute for the exact product instructions.
| What you notice | What it can indicate | What should happen before painting |
|---|---|---|
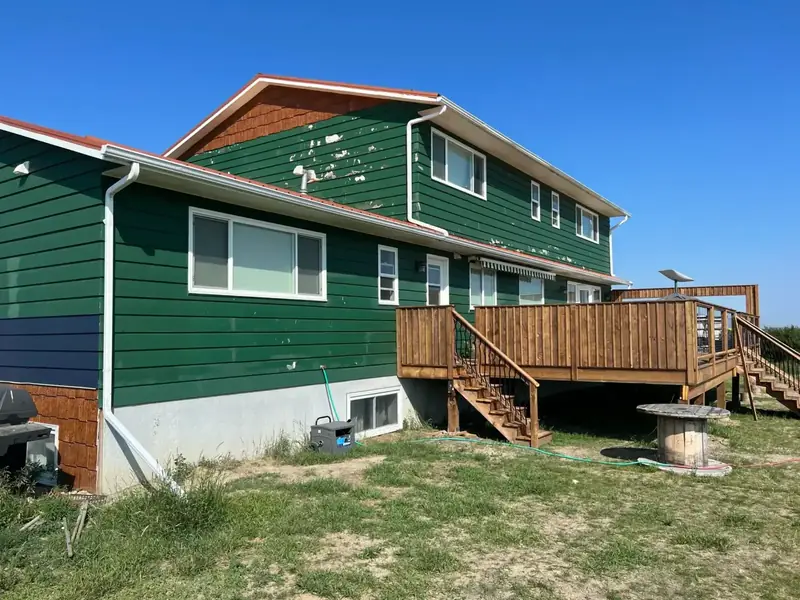
| Powder transfers to a clean hand or cloth | Chalking, weathered paint or loose surface residue. | Use an appropriate cleaning method, rinse if required, dry and reassess whether a compatible primer is needed. |
| Paint flakes, curls or lifts at an edge | An existing coating has lost adhesion. | Remove unstable material back to a sound edge, investigate the cause and prepare exposed substrate. |
| Blisters or recurring dark moisture marks | Possible moisture, heat, contamination or incompatible coating. | Identify the likely contributing condition before deciding whether repainting belongs in scope. |
| Open, shrinking or separated caulk | Joint movement, aged sealant or unsuitable previous application. | Assess whether the joint should be sealed, remove failed material where necessary and use a compatible paintable product. |
| Soft, split or decayed wood | Material deterioration rather than a cosmetic coating problem. | Determine whether repair or replacement is needed before primer or paint is considered. |
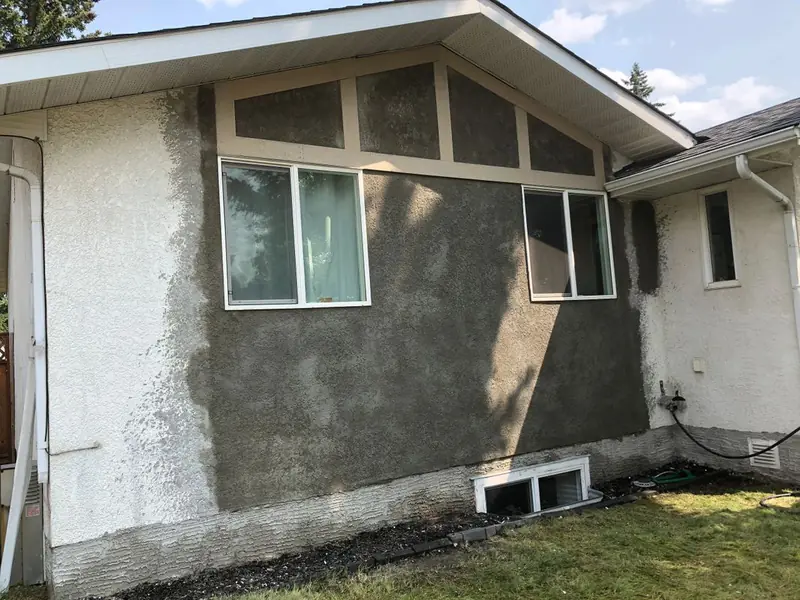
| Cracked, hollow, loose or stained stucco | Surface damage, movement, moisture clues or a failed prior repair. | Assess the crack pattern and substrate, correct suitable defects and preserve the appropriate coating system. |
| Orange corrosion or rust streaks on metal | Corrosion or a breakdown in the previous protective system. | Clean, remove unstable corrosion and select a primer appropriate for the type and condition of the metal. |
| A clean, firm, dry and compatible existing finish | The surface may be ready after ordinary preparation. | Confirm coating compatibility, touch up required areas and follow the selected manufacturer's instructions. |
Ready: the surface is clean, dry, stable and compatible. Needs preparation: the problem can be corrected within the agreed painting scope. Stop and investigate: there are signs of active moisture, decay, significant movement, unsafe existing coatings or damage outside a normal repaint.
For a deeper explanation of existing coating failure, read why paint peels and how to prevent it. If the concern is specifically damaged stucco, our article on how to tell whether stucco cracks need closer attention addresses that narrower question.
Step 1: Identify the substrate and existing coating
An exterior preparation plan begins by identifying what will actually be painted. Stucco, previously painted cedar, engineered wood, fibre cement, vinyl, aluminum, steel and masonry can react differently to cleaning, abrasion, moisture and primer.
The existing finish matters just as much. A firmly attached compatible acrylic coating is different from a brittle older film, a chalky factory finish or a semi-transparent stain. The painter should inspect exposed areas, repairs, previous product information when available, visible staining and whether the finish releases under reasonable examination.
There is also a difference between a quick homeowner screening and a formal adhesion test. A loose edge, obvious flaking or heavy transfer onto a cloth is a useful warning, but it does not replace product-specific testing, proper equipment or professional judgment. Do not cut into an unknown older coating simply to satisfy curiosity.
Different surfaces may belong in different scopes. Our stucco repair and painting service focuses on masonry-related decisions, while our deck and pergola refinishing service addresses exterior wood and stain compatibility.
Step 2: Clean the exterior without damaging it
Exterior surfaces should be cleaned because new paint must bond to the substrate or sound existing coating—not to dust, chalk, pollen, traffic film, biological growth or cleaning residue. Cleaning should expose the real condition of the material rather than force water into the assembly.
Depending on the home, appropriate cleaning can involve controlled washing, hand scrubbing, suitable cleaners, soft brushes and a thorough rinse. High-pressure equipment is not automatically appropriate for every stucco surface, weathered board, vulnerable joint or window perimeter. The operator, nozzle, distance, pressure and direction all matter.
Benjamin Moore's professional guidance for painting vinyl siding explains that chalk, mildew and dirt must be removed, cleaning residue must be rinsed away, and the surface must dry before coating. The same preparation principle applies across many exterior materials even though the cleaning method changes.
What is exterior paint chalking?
Chalking is the powdery residue that can develop as an exterior coating weathers. If a hand or clean cloth picks up a noticeable film, the coating may need more than a quick rinse. The objective is to remove unstable residue, allow proper drying and determine whether the remaining surface requires a compatible bonding or problem-solving primer.
A primer should not be treated as permission to paint over heavy, loose chalk. The surface must first be prepared to the level required by the chosen coating system. Our article about pressure washing before exterior painting explains the cleaning side in greater detail.
How long should a house dry after washing?
There is no reliable universal answer. Drying depends on the substrate, wash method, temperature, humidity, sun exposure, airflow, shade and the specific primer or finish. A wall that feels dry on its face can still hold moisture in joints, repairs, textured masonry or weathered wood. The work should proceed only when the material meets the selected system's requirements.
Step 3: Remove loose paint and prepare sound edges
Peeling paint is not a surface that a fresh coating can permanently stabilize by covering it. Loose material must be removed back to an adequately bonded edge, and the reason it failed should be considered. Painting over a weak layer simply makes the new finish dependent on the old failure.
Scraping, suitable sanding, brushing or other controlled preparation can help remove failing material and soften abrupt transitions. The appropriate method depends on the substrate and coating. Aggressive grinding can damage soft cedar, scar siding and change stucco texture; insufficient removal can leave a weak edge that continues lifting after the job is complete.
Where extensive failure is present, an honest scope should distinguish between limited spot preparation and a larger restoration. Homeowners should know what degree of edge smoothing is realistic, which defects will remain visible and whether the underlying material requires repair or replacement.
Older Calgary homes may need lead-paint precautions
Do not sand, scrape, burn or disturb an unknown older coating until the possibility of lead has been assessed appropriately. Health Canada states that homes built before 1960 probably contain lead-based paint and that exterior paint on homes built between 1960 and 1990 may also contain lead.
The agency's lead-based paint safety guidance explains why disturbing these coatings can create dangerous dust and why proper testing, containment and qualified assistance may be necessary. A painting estimate should identify when a potential hazardous-material concern falls outside an ordinary preparation scope.
Step 4: Repair the surface before expecting the coating to perform
Paint changes colour and adds a coating system. It does not rebuild decayed wood, repair a moving wall, correct a hidden water-entry problem or reverse an unsuitable previous application. The repair decision must come before the finish decision.
Wood and engineered siding
Inspect end grain, lower trim edges, joints, exposed fasteners, vulnerable horizontal surfaces and areas where water can collect. Sound minor defects may be repairable with a compatible exterior product; soft, extensively split or deteriorated material may need replacement instead.
Cedar deserves special attention because tannin staining and weathered fibres can influence primer selection and appearance. Solid-coated exterior wood and semi-transparent stain systems are not automatically interchangeable. Our deck and exterior wood preparation guide explains why existing finishes and desired appearance must be considered together.
Stucco and masonry
Stucco should be examined for crack width, pattern, previous patches, chalking, staining, loose sections and possible moisture concerns. Hairline surface cracks do not automatically call for the same response as a recurring corner crack, a loose repair or a wider opening.
At Dynamic Painting, we do not treat blanket stucco sealing or elastomeric paint as a universal fix. The goal is appropriate repair and a compatible, breathable coating system where the surface and project require it. Parging near grade is its own condition and may need a suitable repair or slurry approach rather than simply being painted.
See our stucco preparation guide, our explanation of when stucco needs repair before painting, and our article on why stucco needs a breathable coating strategy.
Metal details and garage doors
Previously painted metal, bare steel, galvanized surfaces and aluminum do not necessarily require the same preparation. Oils, oxidation, visible rust and adhesion problems should be addressed according to the material and coating manufacturer's system.
Garage doors also expand and contract, have moving joints, and may combine factory finishes with metal, wood or vinyl components. The surface type, existing coating, weatherstripping and acceptable colour should be checked before painting. Benjamin Moore's garage-door preparation and product guidance explains why primer and colour decisions can differ by material.
Step 5: Caulk appropriate joints—not every opening in sight
Exterior caulking should be used where a suitable, paintable sealant belongs in the actual assembly; it should not block intended drainage, ventilation, weep paths or product-specific movement joints. The purpose is controlled joint management, not covering every visible gap.
Window and door trim transitions, selected material junctions and suitable penetrations may warrant attention when the existing sealant is cracked, shrinking or separated. The correct response depends on joint design, substrate, movement, existing sealant and manufacturer instructions.
Failed material may need removal before new caulk is applied. A fresh bead placed over loose, contaminated or incompatible sealant can separate even when it looks tidy on the first day. Our separate article on why exterior caulking fails explains those failure patterns.
Should primer go on before or after caulking?
The correct sequence depends on the exposed material, primer, sealant and manufacturer's instructions. Benjamin Moore's home-exterior preparation guide recommends priming before caulking and patching in its example process. That is a useful reminder that bare substrate, repair products and sealant compatibility should be assessed together rather than handled by a universal rule.
Fresh sealant also needs the curing or paint-over time specified for that product. Painting too early, filling oversized joints with an unsuitable product or blocking drainage details can create problems that are more serious than the original cosmetic gap.
Step 6: Choose primer for the problem—not because every wall needs it
Exterior primer is appropriate when it addresses a real substrate, stain, adhesion, porosity or coating-compatibility requirement. A sound, previously painted surface may not need a separate full primer coat, while exposed wood, a stain-prone cedar section, certain masonry repairs, bare metal or an adhesion-sensitive surface may need a specific system.
| Surface condition | Why primer may matter | Professional decision |
|---|---|---|
| Sound, compatible existing paint | A full primer coat may add no benefit if the selected finish permits direct application. | Confirm cleanliness, adhesion and manufacturer compatibility. |
| Bare wood or exposed repair | Porosity and exposed substrate can affect adhesion and finish uniformity. | Spot-prime or prime the affected material using a suitable exterior system. |
| Cedar or tannin-prone wood | Extractives can migrate and create visible staining. | Choose a primer designed for the substrate and the actual staining risk. |
| Chalky previous coating | Residual instability can interfere with the next coating. | Remove loose chalk first, then evaluate whether an appropriate primer is required. |
| Bare steel or corrosion-prone metal | Unprotected metal may need a corrosion-conscious coating system. | Identify the metal, prepare it correctly and use the specified compatible primer. |
| Repaired or uncoated masonry | Porosity, alkalinity, repair condition and coating compatibility can vary. | Follow the actual masonry, repair and coating-system requirements. |
| Vinyl or factory-finished siding | Some sound surfaces accept approved finishes directly; pitted or porous areas may not. | Confirm surface condition, product approval and vinyl-safe colour selection. |
Benjamin Moore notes in its vinyl-siding coating instructions that properly prepared vinyl often does not need a separate primer, while pitted or porous vinyl does. That distinction is more useful than claiming every exterior must always be primed in the same way.
If you are comparing products advertised as all-in-one solutions, our guide to paint and primer in one explains why marketing language does not override substrate condition.
Step 7: Protect the parts of the property that are not being painted
Professional preparation also includes controlling where dust, wash water, repair residue and paint can travel. The protection plan should match the agreed surfaces, access conditions, application method and nearby property.
- Mask and protect windows, glass, hardware and adjacent finishes.
- Cover or manage landscaping, decks, concrete, walkways and nearby vehicles as appropriate.
- Protect unpainted roofing, brick, stone, weatherstripping and architectural details.
- Keep gutters, downspouts and other excluded components outside the painting scope.
- Account for wind and overspray when spray application is part of the project.
- Identify neighbouring property, pets, gates, access paths and clean-up expectations.
Not every exterior includes the same items. Painting a garage door, front entry, shutters or specific trim can change the protection requirements and should be stated in the written scope. Soffits and fascia should not be assumed to be included simply because they are visible near the roofline.
Step 8: Respect Calgary weather, surface temperature and overnight conditions
The right exterior painting window depends on air temperature, surface temperature, moisture, direct sunlight, wind, humidity, forecast conditions and the actual primer or paint instructions. A sunny afternoon is not enough if the wall is damp or the overnight conditions fall outside the product's requirements.
Benjamin Moore states that some AURA Exterior products can be applied at temperatures as low as approximately 1.7°C. That number is a product-specific lower limit, not a promise that every cold day is suitable, every surface is dry, or a fresh coating will have an adequate curing window. Different coatings, repair materials and primers have different requirements.
The manufacturer's exterior painting temperature guide explains why surface temperature, direct sun, humidity and rain all matter. Its Canadian AURA Exterior product information describes the coating's stated low-temperature application and breathable-film characteristics.
How sun, wind and moisture change the job
A dark, south-facing wall in direct sun can become much hotter than the reported air temperature. A shaded north wall may remain cooler and wetter. Wind can accelerate surface drying while also carrying dust or overspray. Morning dew, a recent wash, approaching rain and an abrupt overnight temperature drop can all change whether work should proceed.
The planning lesson is simple: the job should follow conditions on the wall, not just a weather-app headline. For more detail, read our article about exterior painting in Calgary's climate or our guide to choosing the right season for an exterior repaint.
Exterior preparation by surface: what changes from one material to the next?
Previously painted wood and trim
Check coating adhesion, open joints, exposed end grain, splitting, softness and stain-prone areas. Remove unstable paint, prepare edges, correct agreed defects and prime exposed material when the coating system requires it. Soft cedar needs controlled preparation because aggressive sanding or washing can damage the fibres.
Engineered wood and fibre-cement siding
Review factory finishes, existing paint condition, joint details, previous repairs, exposed fasteners and installation-specific instructions. The presence of a joint does not automatically mean it should be filled. Material-specific drainage and movement details should be preserved.
Vinyl and aluminum siding
Remove chalk, dirt and contamination before assessing adhesion. Approved coating systems and colour restrictions matter, particularly when dark colours could increase heat exposure on vinyl. Oxidized aluminum or pitted surfaces can require a different preparation decision than sound factory-finished siding.
Stucco, brick and masonry
Look beyond colour. Assess cracks, porosity, chalking, previous coatings, repair texture, staining and possible moisture clues. New masonry and fresh repairs must satisfy the actual manufacturer's cure and coating requirements. Breathability and compatibility matter; a thicker coating is not automatically a better solution.
Benjamin Moore's professional stucco painting guide illustrates why repair size, surface preparation, primer and the finishing system must be considered together. Our Calgary stucco specialists can clarify what falls within an actual project scope.
Garage doors and selected metal details
Check whether the surface is painted, coated, galvanized, aluminum, steel or vinyl. Remove contamination and unstable corrosion, avoid coating moving seals or hardware, and choose the preparation and primer system according to the material. The objective is adhesion and function, not simply matching the house colour.
A practical exterior painting estimate checklist for homeowners
If two exterior estimates show different prices, first ask whether they describe the same preparation. A vague line reading “prep included” does not tell you how peeling paint, chalky siding, damaged stucco, failed joints or exposed cedar will be handled.
- Included surfaces: Which elevations, siding materials, trims, doors and garage doors are actually included?
- Existing condition: Are chalking, peeling, staining, corrosion, failed caulk and visible repairs noted?
- Cleaning method: Will the material be washed or hand-cleaned appropriately, and how will drying be verified?
- Loose coating removal: Is there a reasonable plan for scraping, edge preparation and unstable existing finishes?
- Repairs: Which stucco cracks, minor surface defects or wood repairs are included, and which conditions require a separate trade?
- Caulking: Which joints are appropriate to seal, and how will drainage or ventilation details remain clear?
- Primer: Which bare materials, repairs, stains or problem surfaces require a dedicated primer?
- Coating system: Is the actual product family identified, and is it appropriate for each material?
- Weather planning: How will rain, moisture, wind, surface temperature and overnight conditions affect the schedule?
- Protection: How will glass, landscaping, concrete, neighbouring property and excluded components be protected?
- Exclusions: Are gutters, downspouts, roof-related details, structural repairs or hazardous-material work clearly excluded when not included?
- Business terms: Are payment, insurance, WCB coverage and the written materials-warranty terms clear?
Our what to look for in a painting contractor page explains the service standards behind those questions, and our written painting warranty explains the actual materials coverage and limitations. A manufacturer product warranty is separate from the painting contractor's own written warranty and should never be presented as the same promise.
Five preparation shortcuts that create expensive exterior paint failures
1. Painting over chalk because the wall looks clean from the driveway
Weathered coating residue can interfere with adhesion even when the house appears presentable from a distance. The wall needs an appropriate close-up assessment, cleaning and, where required, a compatible primer.
2. Treating every stucco crack as a caulking job
Crack size, movement, location, texture and possible moisture change the response. Filling everything with the same product can leave visible ridges or conceal a condition outside the painter's scope.
3. Assuming premium paint makes preparation optional
A high-quality coating can offer excellent performance when used on a correctly prepared, compatible substrate. It cannot permanently bond a loose older layer, repair deteriorated wood or make a wet wall ready.
4. Confusing the air temperature with the temperature of the wall
Direct sunlight, shade, wind and the existing colour can make surface conditions significantly different from the forecast. Product limits apply to the coating system and actual application conditions, not just the number on a phone.
5. Hiding preparation behind an undefined estimate
When repairs, masking, washing, primer and exclusions are left vague, homeowners cannot compare projects fairly. A written surface-specific scope is more helpful than an impressive product name without any explanation of what happens underneath.
For the wider difference between coating quality and workmanship, read where painting jobs fail when preparation is rushed.
Exterior paint preparation: answers to common homeowner questions
Do professional painters wash a house before painting?
They should clean exterior surfaces when dirt, chalk, pollen, residue or biological growth would interfere with adhesion. The correct method depends on the material and condition. Controlled washing, hand scrubbing and compatible cleaners are different tools; high pressure is not automatically appropriate everywhere.
Can exterior paint be applied over chalky siding?
Not without preparing the surface according to the selected coating system. Loose chalk should be removed, the material should dry, and the remaining surface should be assessed for adhesion and any compatible primer requirement.
Does every exterior need a full coat of primer?
No. A sound, clean, compatible existing coating may not require full priming. Bare wood, exposed repairs, tannin-prone cedar, certain masonry, pitted siding and some metal conditions may require targeted or full priming based on the product instructions.
Can painters cover peeling paint with another coat?
No. The new finish depends on the layer beneath it. Loose material should be removed back to an adequately sound edge, and the underlying cause should be considered before repainting.
Should all exterior gaps be caulked before painting?
No. Suitable paintable joints may need fresh caulking, but drainage paths, weep openings, ventilation details and manufacturer-specific movement joints should not be blocked.
What temperature is safe for exterior painting in Calgary?
The safe temperature is the range stated for the exact primer, repair product and finish being used. Some AURA Exterior products permit application at approximately 1.7°C, but surface moisture, direct sun, wind, overnight temperature and cure time still have to suit the system.
Can stucco simply be sealed before painting?
Not as a blanket rule. Stucco preparation should follow its condition, repair needs, moisture behaviour and coating compatibility. Dynamic Painting does not use universal stucco sealing or elastomeric coatings as shortcuts for unresolved problems.
What happens if exterior wood is still wet after washing?
The coating should wait until the wood satisfies the selected product's moisture and application requirements. A dry-looking face does not prove that joints, end grain or deeper material are ready.
Can a dark colour be used on vinyl siding?
Only when the colour and coating system are specifically suitable for that vinyl product. Heat absorption and manufacturer restrictions need to be checked before choosing a darker finish.
Is exterior painting preparation different in Airdrie or Cochrane?
The preparation principles are the same, but exposure, wind, construction type and surface condition can vary by property. We assess each home individually across Airdrie, Cochrane, Chestermere and Calgary.
What if an older home might have lead-based exterior paint?
Stop before sanding, scraping or otherwise disturbing the coating and arrange an appropriate assessment. Health Canada's lead-paint safety recommendations explain why older coatings can require testing, safe containment and specialized handling.
Who wrote this exterior preparation guide?
This guide was written by Marc Sharkey of Dynamic Painting Inc., a Calgary-area residential painting contractor whose work includes exterior painting, stucco repair, interior painting and exterior wood refinishing. Our preparation standards are shaped by the actual surfaces, existing conditions and product requirements encountered on Calgary and Airdrie homes.
Dynamic Painting carries $5 million in liability insurance, maintains WCB coverage, does not require an upfront deposit, and provides a written two-year materials warranty subject to its published terms. Homeowners can review our local awards and recognition and browse real exterior and stucco project photographs.
For the complete cross-surface framework, start with Professional Paint Preparation: The Complete Homeowner Guide. For indoor work, continue to professional interior paint preparation. For a home-specific exterior assessment, visit our Calgary exterior painting services or request a free painting estimate.
Manufacturer and public-safety references
- Benjamin Moore Canada: How to Paint Your Home Exterior
- Benjamin Moore Canada: Temperature Guide for Exterior Painting
- Benjamin Moore Canada: AURA Exterior Paint
- Benjamin Moore Canada: Painting Vinyl Siding
- Benjamin Moore Canada: How to Paint Stucco
- Benjamin Moore Canada: How to Paint a Garage Door
- Health Canada: Lead-Based Paint Safety