
A beautiful finish can make a freshly painted home look convincing for a few days. What determines whether that finish stays attached, looks consistent, and stands up to ordinary use is usually less visible: the condition of the surface underneath and the decisions made before the first finish coat.
Professional painting preparation is the process of inspecting a surface, identifying contamination or existing failure, making appropriate repairs, and creating conditions that suit the coating being applied. It includes protection and masking, but it goes much further than covering the floor. A clean-looking room can still have greasy walls, unstable repairs, glossy trim, moisture stains, or dust that interferes with adhesion. An attractive exterior can hide chalking stucco, weathered wood, failed caulking, and loose previous coatings.
Our working sequence is simple: preparation → adhesion → finish → longevity. Preparation supports adhesion. Sound adhesion allows a finish to perform. A properly selected finish on a suitable surface has a much better chance of lasting. Remove the first step, and everything after it becomes less predictable.
This guide explains how professional painters assess interior walls, ceilings, trim, exterior siding, stucco, masonry, decks, and previously coated wood. It also explains what homeowners can do themselves, where specialist judgment matters, and why no universal checklist replaces an actual inspection.
What professional painting preparation actually means
Paint preparation means making the specific substrate clean, sufficiently dry, stable, compatible, and appropriate for the coating system. The right steps depend on the surface, its existing finish, the damage present, and the product being applied. A previously painted bedroom wall does not require the same treatment as peeling exterior trim, cracked stucco, a stained ceiling, or a deck covered with an existing opaque coating.
The first task is diagnosis. What is the surface made of? Is the existing coating firmly attached? Is the problem cosmetic, or does it suggest moisture, movement, contamination, or material deterioration? What finish is already there, and will the proposed coating bond to it? A professional scope should answer those questions before promising a particular number of coats.
Preparation can involve inspection, washing or spot cleaning, scraping, sanding, feathering, filling, drywall repair, appropriate caulking, stain treatment, spot priming, full priming, dust removal, masking, and drying time. Not every job needs every step. Competent preparation means selecting the steps the surface genuinely requires rather than applying the same routine everywhere.
Surface preparation and property protection are different
Drop cloths, furniture covers, careful masking, and floor protection matter because painting happens inside and around someone else’s property. They do not, by themselves, improve the bond between paint and the substrate. Surface preparation addresses coating performance; protection prevents unnecessary damage and cleanup. A thorough painting project needs both.
For example, a perfectly masked kitchen can still produce a poor finish if cooking residue remains on the wall. Conversely, a well-sanded door can still create a bad customer experience if the surrounding flooring and hardware were not protected. Clear project scopes should distinguish these responsibilities.
Is preparation really 80 percent of a paint job?
The familiar claim that preparation is “80 percent” of a professional paint job communicates an important idea: much of the work that determines quality happens before finishing. It is not a scientific measurement or a fixed ratio that applies to every home. A sound, clean wall may need limited preparation, while a peeling exterior or damaged stucco elevation may require substantially more work before coating.
The useful question is not whether a crew spent exactly 80 percent of its time preparing. It is whether the surfaces were correctly diagnosed, protected, repaired, cleaned, stabilized, and matched to an appropriate coating system.
Why preparation determines adhesion, appearance, and longevity
Paint bonds to whatever is immediately beneath it. If that layer is sound, clean, and compatible, the coating has a reasonable foundation. If that layer is grease, chalk, sanding dust, loose paint, deteriorated wood fibre, or unstable patching compound, the new finish depends on material that may not remain attached.
Preparation also affects appearance. Unfilled nail holes, ridges around previous repairs, rough trim, uneven caulking, and differences in substrate porosity can remain visible even after a room has changed colour. Extra paint may improve coverage, but it does not automatically remove texture differences or repair physical damage.
Longevity depends on more than adhesion alone. Moisture, ultraviolet exposure, building movement, product selection, application conditions, and maintenance also matter. Good preparation cannot guarantee a specific lifespan, but it removes avoidable obstacles that commonly undermine otherwise suitable coatings.
| Surface condition | Likely concern | Preparation decision |
|---|---|---|
| Greasy kitchen wall | Contamination interferes with bonding | Clean appropriately, rinse if required, and allow the surface to dry |
| Glossy painted trim | Smooth existing finish may resist the next coating | Assess compatibility, clean, dull where appropriate, and choose a suitable primer when required |
| Peeling exterior paint | New paint depends on an unstable existing layer | Investigate the failure, remove loose material, feather sound edges, and address the underlying cause |
| Chalking stucco | Powdery residue can prevent reliable adhesion | Assess the coating and substrate, clean suitably, allow drying, and follow coating-system guidance |
| Patched drywall | Different texture and porosity may telegraph through the finish | Finish and sand repairs, remove dust, and prime where needed |
| Previously stained deck | The existing system may be incompatible with the desired finish | Identify the old coating before choosing cleaning, sanding, removal, or a compatible recoating system |
Benjamin Moore’s room-painting guidance distinguishes previously painted walls from unfinished drywall, while its trim preparation guidance discusses glossy finishes, repairs, and priming. Those distinctions are the point: preparation follows the actual substrate.
Start with inspection rather than assumptions
A useful inspection looks beyond colour selection. Indoors, examine walls in normal and angled light, check around switches and hand-contact areas, inspect corners and baseboards, identify repaired patches, and look for stains or evidence of previous moisture. Review ceilings, trim, doors, window surrounds, furniture placement, floor protection, and how people will use the rooms during the project.
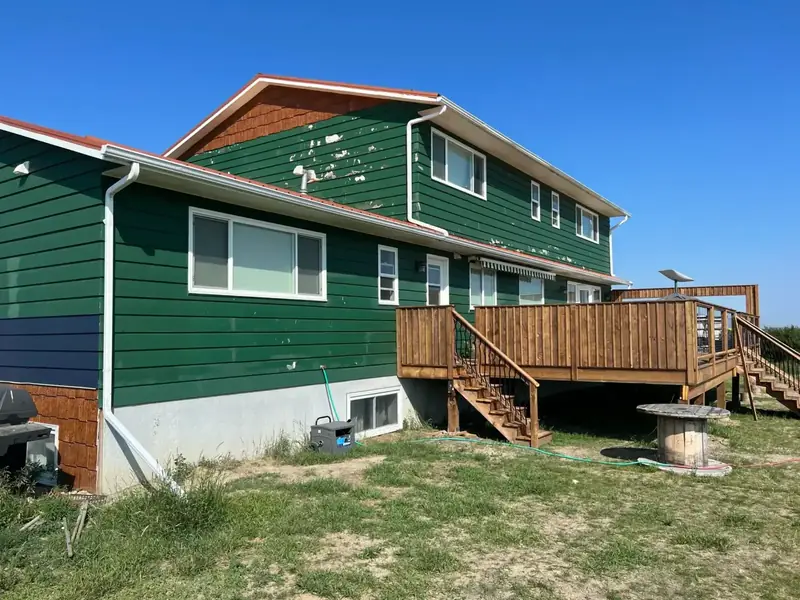
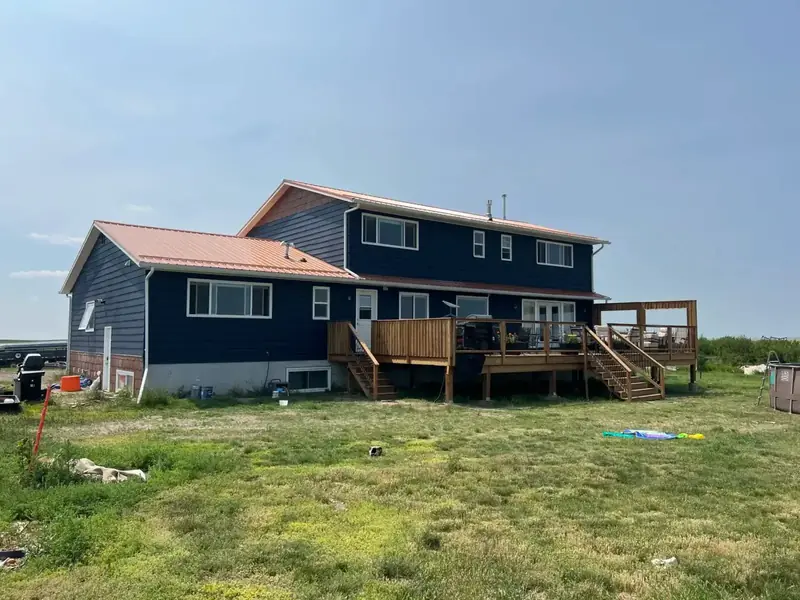
Outside, walk each elevation separately. Sun exposure, wind, drainage, rooflines, landscaping, and previous repairs can create very different conditions around the same building. Check coating attachment, cracks, chalking, deteriorated caulking, damaged wood, staining, splashback, and areas where water may collect. Identify whether the issue belongs to the coating, the substrate, or another building component.
Some observations justify additional expertise. Persistent moisture, significant movement, widespread substrate deterioration, or suspected hazardous materials may require assessment beyond a painter’s scope. Painting should not be presented as a solution to an active leak, structural movement, or unresolved building-envelope problem.
Interior painting preparation: what happens before walls are painted
Interior preparation usually includes assessing the rooms, protecting finished surfaces, addressing damage, cleaning where necessary, sanding repairs or incompatible sheen, removing dust, and applying primer where the substrate requires it. The extent depends on how the home has been used and what finish already exists.
Protect floors, furniture, fixtures, and daily routines
Interior work takes place around flooring, furnishings, cabinetry, electronics, pets, and daily household activity. A preparation plan should identify what will be moved, what will be covered, how access will be maintained, and how dust will be controlled where practical. Light fixtures, hardware, and wall plates may need protection or appropriate removal depending on the scope.
Masking should support clean transitions without becoming a substitute for skill. Tape selection, adhesion, removal timing, and the condition of the surface being masked all matter. Delicate finishes can be damaged by inappropriate tape or careless removal.
Clean the areas that actually need cleaning
Not every wall needs a complete wash. A clean, stable bedroom wall may only need localized attention, while kitchen areas, switch plates, stairwell hand-contact zones, bathrooms, and smoke-exposed spaces can require more thorough cleaning. The goal is to remove contamination without leaving cleaner residue that creates a different adhesion problem.
Cooking grease is particularly deceptive because it can be present without looking dramatic. A coating applied over that film is bonding to the contamination, not necessarily to the stable finish underneath. Cleaning products and methods should suit the surface and the coating manufacturer’s instructions, followed by adequate drying.
Repair nail holes, dents, cracks, and unsuccessful previous patches
Small holes and dents can often be filled and finished as part of ordinary preparation. Larger damage, repeated cracking, torn drywall paper, poor earlier patches, or raised repair edges may require more work. The repair needs to be stable, properly shaped, sufficiently dry, and finished to suit the surrounding surface.
Lighting changes the standard. A wall beside a large window or a hallway with strong directional light can reveal imperfections that are less noticeable elsewhere. Repair expectations should be discussed before work begins, especially when an existing wall has numerous old patches or a prominent texture difference.
Paint is not drywall compound. It cannot rebuild a damaged corner, level a significant depression, or eliminate a raised ridge. Covering those conditions without correcting them may change the colour while leaving the defect obvious.
Sand with a purpose and remove the resulting dust
Sanding can flatten patching compound, soften repair edges, remove nibs, dull a glossy existing finish, or refine previously painted trim. The correct approach depends on the coating, substrate, and defect. Aggressive sanding across an otherwise sound wall is not automatically better preparation.
After sanding, loose dust must be removed appropriately. Otherwise the next coating may be applied over a fine powder instead of a stable surface. Dust-control methods should suit the task and occupied space; no responsible contractor should promise an inherently dusty process is absolutely dust-free under every condition.
For a closer look at this step, read why professional painters sand walls before painting.
Prepare trim, doors, and high-contact surfaces separately
Trim and doors experience hand contact, cleaning, impacts, and repeated use. Existing finishes can be harder or glossier than wall paint, and previous products are not always obvious from appearance alone. Cleaning, surface dulling where appropriate, adhesion assessment, repair, and suitable priming may be more important here than on a sound matte wall.
Door edges and profiles add complexity. Hardware, previous drips, chipped corners, worn touch points, and tight tolerances should be assessed before coating. A beautiful wall finish does not compensate for a door that sticks because coating buildup was ignored.
Handle bare drywall, stains, and repaired areas appropriately
Bare drywall and patching compound can absorb coatings differently from surrounding painted surfaces. Priming may be needed to establish a more consistent foundation. The choice between spot priming and broader priming depends on the amount of repair, product requirements, finish expectations, and differences in porosity.
Water stains require two separate questions: has the source been corrected, and does the remaining mark require an appropriate stain-blocking primer? Coating an active moisture problem does not repair it. Once the underlying issue is resolved and the surface is sufficiently dry, a compatible specialty primer may help prevent the stain from migrating through subsequent coats.
See how these decisions apply to an actual project through our interior painting services, explore our interior painting preparation guide, and use the narrower homeowner preparation checklist for what to do before a crew arrives. For high-contact woodwork, read our focused guide to trim and door paint preparation.
Ceiling preparation deserves its own inspection
Ceilings receive light differently from walls and can make flashing, inconsistent repairs, stains, and application marks easier to notice. Inspect for water marks, previous patching, texture damage, hairline cracking, and evidence of past leaks before choosing a coating plan.
A stained ceiling should not simply be painted white again without checking why the stain appeared. Repairs should respect the existing ceiling texture and condition, and priming should match the stain or substrate concern. For textured or older surfaces, disturbance may create additional safety considerations.
Health Canada explains that asbestos fibres can be released during renovation activities in its guidance on asbestos and indoor air safety. Suspect materials should be assessed appropriately before sanding, scraping, or removing texture. Review our ceiling painting and finishing services and ceiling preparation guide for project-specific considerations.
Exterior painting preparation: diagnosing exposure and existing failure
Exterior preparation begins by assessing each substrate and elevation, removing contamination and unstable coatings, completing suitable repairs, allowing proper drying, and matching primers and finishes to the actual surface and weather conditions. The objective is not to make a tired exterior look clean for a weekend; it is to provide a stable foundation for the selected coating system.
Inspect each side of the building independently
A south- or west-facing wall may show different ultraviolet exposure from a sheltered elevation. Wind can deposit dust differently around corners, and splashback near grade can affect the lower portion of an exterior. Window details, roof intersections, damaged caulking, and landscaping can each influence how a surface weathers.
Because those conditions vary, one elevation may need more extensive scraping or repair than another. A realistic scope accounts for visible differences instead of assuming the entire building requires identical preparation.
Clean dirt, dust, chalk, and biological contamination appropriately
Exterior coatings need to bond to a stable surface, not a layer of airborne dust, chalking pigment, or biological residue. Washing methods must match the substrate. Excessive pressure can damage wood fibre, force water behind vulnerable materials, or worsen already-fragile surfaces.
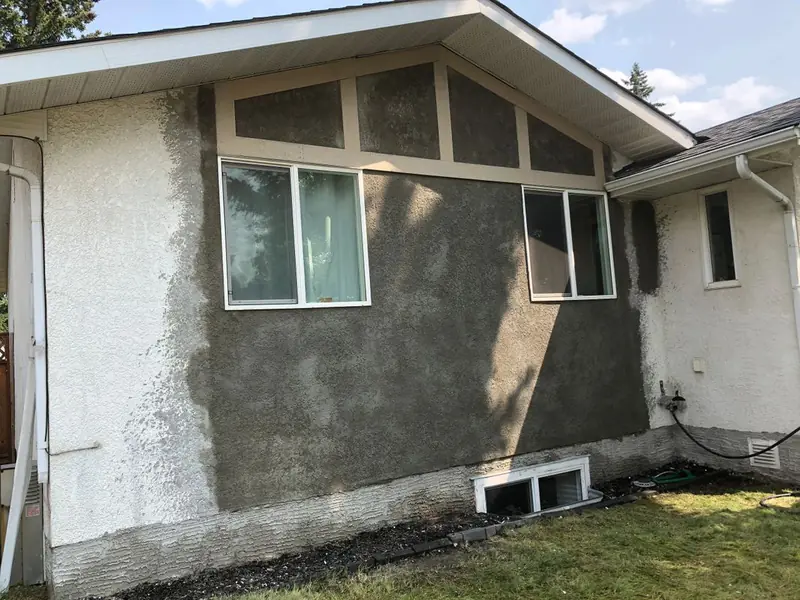
Chalking deserves particular attention. If rubbing a painted surface leaves a powdery residue, the existing coating may be degrading or the surface may carry accumulated material that interferes with adhesion. Cleaning, drying, and primer decisions depend on the severity and the selected manufacturer’s instructions.
Where mildew or algae are relevant, the contamination and contributing conditions should be assessed rather than simply covered. Appropriate cleaning and drying matter, and persistent water exposure may require attention beyond paint.
Remove loose paint and feather sound edges
New paint cannot make a detached old coating permanently reattach to the substrate. Loose, flaking, or peeling material should be removed until the remaining coating is sound. Edges may need feathering so the transition is less visible after painting.
However, removal alone is not diagnosis. If the failure results from repeated moisture, poor compatibility, deteriorated wood, or ongoing movement, those conditions still need to be considered. Otherwise the same failure mechanism can continue beneath a new finish.
Assess caulking, joints, and damaged materials
Failed caulking can create gaps, visual defects, or opportunities for water entry in locations where a compatible sealant is appropriate. Existing loose or deteriorated material may need removal before replacement. Not every joint should be sealed, and building details designed to drain or move must not be indiscriminately closed.
Rotting wood, unstable masonry, damaged trim, and persistent moisture cannot be corrected by applying extra paint. The project scope should identify whether repair or replacement is required before coating and whether another trade needs to address the underlying issue.
Allow the surface to dry and respect application conditions
After washing, rainfall, dew, or moisture-related repairs, the substrate needs appropriate drying time before coating. A surface can feel dry at the outermost layer while retaining moisture deeper within porous wood or masonry. Suitable timing depends on the material, weather, exposure, and product instructions.
Temperature, direct sun, wind, humidity, and the forecast can all influence application and curing. Do not rely on a universal temperature range or drying schedule; consult the technical data sheet for the exact primer or finish being used.
Our exterior painting page and dedicated professional exterior paint preparation guide explain how these decisions fit into an overall exterior project from the initial assessment through the final walkthrough.
Stucco and masonry preparation: why diagnosis comes first
Stucco should be inspected for cracking, chalking, loose coatings, prior repairs, contamination, and moisture concerns before any coating system is selected. The same visible crack can have different implications depending on its width, location, movement, substrate condition, and whether water appears to be involved.
Separate minor surface cracking from more significant concerns
Small surface cracks may be preparation or repair issues within the scope of an ordinary painting project. Larger, recurring, widening, or patterned cracks can suggest movement or another condition that deserves closer attention. A painting contractor should not diagnose structural causes beyond their expertise, and paint should never be described as a substitute for necessary repair.
Repair methods must suit the actual stucco system, texture, crack characteristics, and coating plan. Simply filling every visible line with the same caulking product can produce obvious ridges, mismatched texture, or an unsuitable result.
Check chalking, failed coatings, and weak previous repairs
Stucco and masonry surfaces may carry dust, deteriorated coatings, or repair material that is not securely bonded. Washing or other cleaning must respect the condition of the surface. Loose coatings and unstable repairs should not be treated as a reliable foundation for new paint.
Texture matching matters too. A structurally sound repair can still become visually prominent if the surrounding profile and finish were ignored. The extent of blending depends on the existing texture, repair location, coating, and viewing conditions.
Do not treat sealing or elastomeric coatings as automatic solutions
Dynamic Painting does not present blanket stucco sealing or elastomeric coatings as the default answer to every cracked or weathered exterior. Coating choices need to follow the actual substrate, repair requirements, moisture considerations, and manufacturer guidance. A thicker or more heavily marketed product does not automatically solve an underlying building or coating problem.
Parging also deserves separate consideration. It is not automatically a surface that should be painted simply because nearby stucco is being coated. Its condition, moisture exposure, existing finish, and appropriate repair strategy should be assessed independently.
For project-specific repair and coating information, visit our stucco painting and repair page or our detailed stucco preparation guide. For a narrower discussion of existing damage, read why stucco repair should come before painting.
Wood and deck preparation: identify the previous finish first
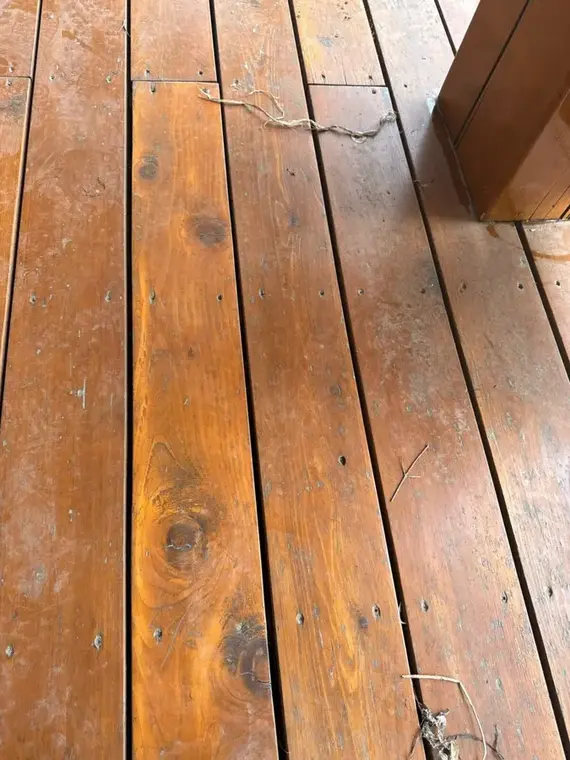
Exterior wood preparation depends on whether the existing surface is bare, weathered, coated with a solid stain, finished with a penetrating or semi-transparent product, or affected by failed previous coatings. The desired appearance cannot be separated from the finish that is already present.
Understand weathered grey wood and damaged surface fibres
Outdoor wood can become grey or uneven after exposure to ultraviolet light, weather, and repeated wetting and drying. The weathered surface layer may not provide the same foundation as sound underlying wood. Depending on the project, appropriate cleaning, sanding, brightening, or other restoration steps may be needed before finishing.
Cleaning alone does not necessarily remove all damaged fibre, and sanding alone does not automatically correct staining, moisture, or incompatible existing coatings. The preparation sequence should reflect the actual problem instead of relying on a single universal treatment.
Distinguish solid stains from penetrating and semi-transparent systems
Solid stains leave an opaque or largely opaque visual result, while penetrating or semi-transparent systems are generally selected to retain more visible wood character. If an existing deck already carries a solid coating, applying a semi-transparent product over that coating will not reveal the underlying grain. Moving from solid to semi-transparent normally requires appropriately removing the existing opaque system and confirming that the wood is suitable for the desired finish.
Similarly, a deck previously coated with a particular system cannot automatically accept every competing product. Existing film build, weathering, product compatibility, and the amount of removal achieved should determine what comes next.
Use sanding, cleaning, and moisture control for the actual condition
Sanding can remove damaged surface fibre, refine uneven areas, and help create a more consistent foundation where appropriate. It must be matched to the wood condition and the selected coating system. Excessive sanding, incomplete removal of an incompatible old coating, or finishing over remaining dust can create new problems.
The wood must also be sufficiently dry for the specific stain or finish. Do not use a universal moisture percentage unless it is supported by the chosen product’s technical instructions. Shaded boards, end grain, areas near grade, and sections exposed to recent rain may dry at different rates.
Understand tannin stains and oxalic-acid wood brightening
Some exterior woods develop grey oxidation, dark tannin-related marks, or uneven discoloration. Oxalic acid can be useful as a wood brightener in appropriate circumstances, but it does not replace cleaning, failed-coating removal, sanding, thorough rinsing, or proper drying. The product, dilution, safety precautions, and compatibility must follow the manufacturer’s instructions.
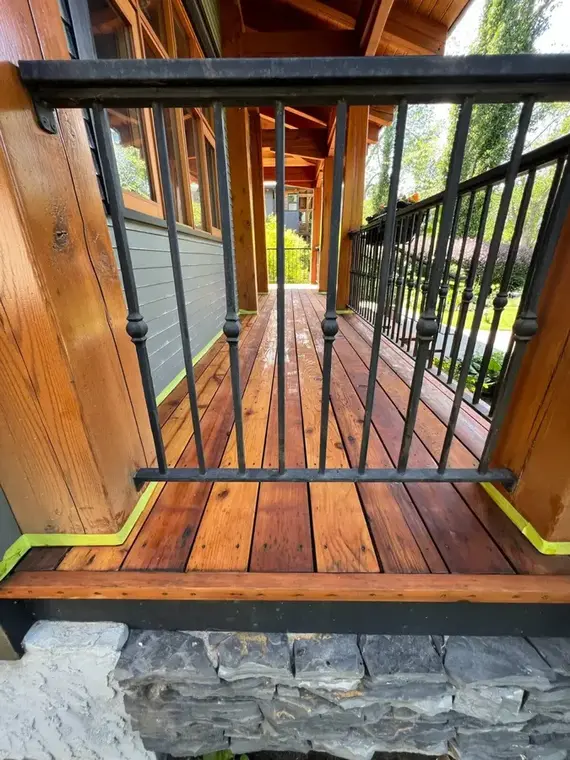
Our detailed article on oxalic acid and wood renewers explains this narrower restoration subject in depth. For actual project work, finish-system selection, and refinishing, see our deck and pergola refinishing services and deck and exterior wood preparation guide.
When primer is necessary—and when it may not be
Primer is necessary when the surface condition or coating manufacturer calls for a dedicated product to support adhesion, control porosity, block stains, address bare material, or improve compatibility. A sound, previously painted surface may not always need a separate full primer coat.
Bare drywall, exposed wood, substantial repairs, persistent stains, glossy existing finishes, or unusual substrate differences may each call for different priming decisions. One primer does not solve every problem: a stain-blocking product, bonding primer, and general-purpose drywall primer serve different purposes.
Spot priming can make sense where a limited repaired area needs special treatment. Full priming may be appropriate where the entire surface is bare, extensively repaired, affected by significant variation, or subject to a manufacturer requirement. A drastic colour change may influence coverage planning, but colour change alone does not automatically establish that every surface needs the same primer.
What “paint and primer in one” does—and does not—mean
Products marketed as paint and primer in one can be suitable for certain previously painted, sound, properly prepared surfaces. That label does not mean every stain is blocked, every glossy coating is compatible, every bare substrate is ready, or every manufacturer requirement disappears.
The relevant question is whether the exact product is approved for the exact condition. Review the manufacturer’s technical data sheet rather than treating the front label as a complete preparation specification. Benjamin Moore’s interior painting instructions, for example, explain that previously painted walls and unfinished drywall can require different priming decisions.
What sanding actually accomplishes
Sanding changes the condition of a surface; it does not automatically repair the cause of a coating failure. Depending on the job, sanding can smooth a patch, feather the edge of an old coating, dull a glossy finish, remove roughness, reduce raised wood fibre, or improve the appearance of trim.
A useful sanding plan asks what defect is being addressed. Is there a raised repair edge? A glossy coating that needs preparation for the next system? Flaking paint that requires scraping first? Weathered wood fibre? Dust nibs in an existing finish? Different answers lead to different tools, pressure, abrasives, and dust-control requirements.
Sanding cannot stop a leak, cure rot, stabilize detached paint left underneath, correct incompatible products by itself, or solve structural movement. It can also damage soft wood, create visible scratches, or generate unnecessary dust when used without a clear reason.
Older coatings and suspect materials require caution
Disturbing older painted surfaces can create safety concerns if hazardous materials are present. Health Canada notes that lead exposure can result from renovation activities such as scraping or sanding in its human-health review of lead. Suspect coatings should be assessed before disturbance, with protective measures appropriate to the actual risk.
For chemical removal, Health Canada’s guidance on using paint strippers safely addresses ventilation, protective equipment, and safe handling. No homeowner should assume that a visibly old coating can be sanded aggressively without considering the building, product, and exposure conditions.
Why cleaning is a coating-performance issue
Paint performs best when the coating can contact a stable, suitably prepared surface rather than grease, chalk, dust, wax, soap residue, or biological contamination. Cleaning requirements vary substantially between a bedroom wall, kitchen cabinet, exterior stucco surface, weathered deck, and galvanized metal component.
A cleaner must also be appropriate for the substrate. Strong products, excess water, abrasive methods, or high-pressure washing can damage certain materials. Cleaning residues may need to be removed, and porous surfaces need suitable drying time before coating.
Benjamin Moore’s galvanized-metal preparation guidance illustrates why one material can require a different cleaning and priming approach from wood or drywall. The lesson is not that every home needs metal treatment; it is that substrate identification comes before selecting a method.
Caulking and repairs: paint is not a repair material
Caulking can improve suitable trim joints and appropriate exterior gaps, but it should not be applied indiscriminately. The joint’s location, movement, moisture exposure, existing condition, and need for drainage all influence whether sealant makes sense.
Failed caulking often needs proper removal and replacement rather than a fresh bead placed over loose material. Interior trim gaps may benefit from neat, compatible caulking where appropriate, while certain exterior joints must remain open for drainage or accommodate movement differently.
Cracks also require interpretation. A stable cosmetic line and a recurring crack associated with movement are not the same repair. Filling both in the same way may hide the problem temporarily without addressing why it appeared.
Paint provides colour and a protective finish when used appropriately. It does not rebuild missing stucco, restore rotten wood, correct a poorly finished drywall patch, or permanently bond loose prior coatings.
Why new paint peels, blisters, or fails prematurely
New paint can fail when it is applied over contamination, moisture, unstable old coatings, incompatible finishes, deteriorated substrate, or conditions outside the product’s application requirements. The visible symptom does not always identify the underlying cause.
Peeling may indicate that an existing layer was already weak or that the new coating could not bond properly. Blistering can involve moisture or application conditions, depending on the situation. Uneven sheen can reflect differences in substrate porosity, patching, priming, or application technique. Persistent stains may indicate that the source remained unresolved or that an unsuitable primer was used.
Effective correction begins with the failed layer and the condition beneath it. Remove what is unsound, investigate why it failed, determine whether moisture or incompatibility remains, and select a repair and coating system suited to the surface. Applying more finish without that diagnosis often repeats the same mistake.
Questions that help identify the actual failure
- Is the new coating peeling away from the previous paint, or is the entire old coating separating from the substrate?
- Is the failure concentrated near windows, grade, rooflines, plumbing, or other potential moisture sources?
- Does the surface leave chalk or dust on a hand?
- Is the underlying finish glossy, greasy, weathered, or visibly contaminated?
- Was the substrate repaired, washed, or exposed to rain shortly before coating?
- Does the damage occur on one elevation more than others?
- Were primer, finish, temperature, drying, and recoating requirements appropriate for the selected product?
Preparation versus number of coats
Two coats applied over a poorly prepared or unstable surface are still two coats over a poorly prepared or unstable surface. Coat count can affect coverage, colour uniformity, and manufacturer compliance, but it cannot replace a stable substrate.
A written promise of “two coats” does not explain whether grease was removed, cracks were assessed, failed paint was scraped, repairs were sanded, bare areas were primed, or the coating was appropriate for the existing finish. Those details often determine whether the promised coats have a suitable foundation.
The correct coating schedule depends on surface condition, colour change, product coverage, primer requirements, manufacturer instructions, and the agreed finish standard. One job may require spot primer and finish coats; another may require a full primer coat because the substrate is bare or heavily repaired. A deck or masonry surface may follow an entirely different system.
Ask contractors to describe preparation and product selection separately from the number of coats. A detailed scope makes it easier to compare proposals that otherwise use the same simple marketing language.
How Calgary and Southern Alberta conditions change preparation
Exterior surfaces around Calgary and Airdrie experience changing sun exposure, wind, airborne dust, dry conditions, rapid temperature shifts, and seasonal freeze-thaw cycles. These factors do not create one universal preparation method, but they influence what deserves attention during inspection.
Strong sun and ultraviolet exposure
Exposed elevations and outdoor wood can weather differently from sheltered surfaces. Ultraviolet exposure can contribute to coating deterioration and grey, damaged wood fibre. Preparation should account for the condition found on the most exposed areas instead of assuming the whole home weathered evenly.
Wind, dust, and drying conditions
Wind can place dust and debris onto recently cleaned surfaces or freshly applied coatings. Dry outdoor air and direct sunlight can affect how products behave, while changing weather can make conditions unsuitable later in the day. Scheduling should consider the actual product instructions and forecast rather than relying solely on the calendar.
Freeze-thaw cycles and rapid temperature changes
Cracks, joints, previously repaired stucco, and exterior wood can experience changing conditions across seasons. A visible crack should be evaluated for its actual characteristics rather than automatically sealed or painted over. Temperature swings also make product-specific application and curing requirements especially relevant.
Moisture still matters in a dry climate
A generally dry regional climate does not eliminate localized moisture. Roof runoff, landscaping, sprinklers, snow accumulation, splashback, shaded areas, and building-envelope defects can affect individual surfaces. Painting over a wet or repeatedly wetted substrate remains a risk regardless of the broader climate.
Homeowners outside the city can also review our Airdrie painting service information when local project scheduling or property conditions are relevant.
DIY preparation versus hiring a professional
Many homeowners can competently prepare accessible, previously painted surfaces. Moving small items, protecting furnishings, cleaning ordinary household contamination, filling minor nail holes, sanding simple repairs, and reviewing product instructions are all reasonable tasks when the surface and materials are understood.
The difference between DIY and professional preparation is not that professionals possess a secret step homeowners are forbidden to learn. It is that experience helps identify when a seemingly simple surface hides a compatibility issue, moisture problem, unstable existing coating, hazardous material, difficult repair, or unrealistic finishing expectation.
Professional equipment and planning can also become valuable around occupied interiors, extensive sanding, high ceilings, multi-storey exterior work, damaged stucco, large decks, and projects that require coordinated protection or scheduling. Height, access, dust, ventilation, weather, and building-material uncertainty increase the consequences of a wrong assumption.
Tasks a careful homeowner can often handle
- Photograph and identify visible damage before requesting estimates.
- Move personal belongings and clear accessible work areas.
- Spot-clean hand-contact marks or kitchen residue using an appropriate method.
- Remove simple wall hardware where safe and agreed.
- Fill and lightly sand small, straightforward nail holes.
- Review the manufacturer’s instructions for the selected product.
- Identify previous stain cans, coating receipts, or repair records.
- Ask whether stains, cracks, loose paint, and glossy trim have been included in the scope.
Situations that justify additional experience or assessment
- Recurring leaks, persistent moisture, or unexplained stains.
- Peeling coatings across multiple layers.
- Potential lead-containing coatings or suspect asbestos-containing materials.
- Significant stucco cracks, movement, or unstable repairs.
- Rot, deteriorated substrate, or areas needing another trade.
- High exterior access or difficult ceiling work.
- A desired deck finish that conflicts with the existing coating.
- Occupied homes where protection and dust management are particularly important.
A practical homeowner paint-preparation checklist
Before hiring a painter or starting your own project, walk the property with the actual surfaces in mind. The following questions are more revealing than asking only which paint brand will be used.
| What to inspect | What to ask | Why it matters |
|---|---|---|
| Walls and ceilings | Which holes, cracks, stains, and previous repairs are included? | Visible defects and substrate differences affect the final appearance. |
| Trim and doors | Is the existing coating glossy, damaged, or difficult to bond to? | High-contact surfaces may need targeted cleaning, sanding, or bonding preparation. |
| Exterior coatings | What happens to loose paint, chalking, failed caulking, and damaged materials? | New paint cannot reliably depend on an unstable old layer. |
| Stucco and masonry | How will cracks, repairs, moisture concerns, and texture differences be assessed? | Not every crack or masonry condition should receive the same treatment. |
| Decks and wood | What finish is already on the surface, and is the desired new finish compatible? | Existing coatings determine how much cleaning, sanding, or removal is needed. |
| Primer | Where is primer required, which type is suitable, and why? | Bare materials, stains, repairs, and adhesion issues have different requirements. |
| Property protection | How will flooring, furniture, fixtures, landscaping, and occupied areas be protected? | Good workmanship includes the surrounding property, not just the painted surface. |
| Weather and drying | How will washing, rain, temperature, drying time, and product instructions affect scheduling? | Surface readiness and application conditions influence coating performance. |
Frequently asked questions about painting preparation
Why is prep important before painting?
Preparation creates a suitable foundation for the coating. It helps identify contamination, loose paint, moisture concerns, surface damage, incompatible finishes, and areas requiring primer. Without that foundation, even a high-quality product may look uneven or fail prematurely.
Do walls need to be washed before painting?
Not every wall needs a full wash. Cleaning should match the actual contamination. Kitchen grease, smoke residue, hand-contact marks, dust, and other deposits may require attention, while a clean, stable bedroom wall may only need localized cleaning and ordinary surface preparation.
Do professional painters sand walls?
Professional painters sand when sanding solves a specific problem, such as smoothing repairs, removing surface imperfections, feathering edges, or preparing a suitable existing finish. Sanding every square inch aggressively is not a universal requirement, and resulting dust should be managed and removed.
Do I need primer before repainting?
A separate primer may be required for bare drywall, exposed wood, stains, repairs, glossy existing coatings, or specific compatibility issues. Sound previously painted surfaces do not always need a full primer coat. Follow the actual coating manufacturer’s instructions and the condition of the substrate.
Can you paint over peeling paint?
Not responsibly without addressing the loose coating and why it failed. Peeling material should be removed until the remaining surface is sound, and moisture, contamination, incompatibility, or substrate damage should be assessed before appropriate priming and repainting.
Can you paint over cracked stucco?
That depends on the nature of the crack, the surrounding stucco, the existing coating, and whether moisture or movement is involved. Suitable repairs may be necessary first. Paint is not a substitute for repairing damaged stucco, and neither blanket sealing nor elastomeric coatings should be treated as automatic solutions.
How should exterior wood be prepared?
Identify the existing finish, examine weathering and damage, clean appropriately, remove incompatible or failed coatings as needed, sand where the condition warrants it, and allow suitable drying. The final preparation method should match the exact wood, previous coating, and selected stain or paint system.
How long does paint preparation take?
Preparation time depends on the surface area, existing condition, number of repairs, protection requirements, coating compatibility, access, drying time, and weather. A sound room can require modest preparation, while damaged exterior wood, peeling paint, or cracked stucco can require substantially more work. No single timetable fits every project.
Is one coat of primer and two coats of paint always necessary?
No. The appropriate system depends on the substrate, repairs, stains, existing coating, colour change, selected product, and manufacturer instructions. Some surfaces need specialized primer; others may only need spot priming or no separate primer. Coat count cannot replace preparation.
What causes new paint to peel?
Common causes include painting over loose previous coatings, grease, chalk, dust, moisture, incompatible finishes, deteriorated substrate, or unsuitable application conditions. The visible peeling should be investigated rather than simply covered with another coat.
Can paint fix surface damage?
No. Paint can provide a finished appearance and protection when applied to a suitable surface, but it cannot rebuild damaged drywall, repair unstable stucco, eliminate rotten wood, stop a leak, or permanently reattach a failing existing coating.
What happens if you do not prepare before painting?
The result may include poor adhesion, visible defects, uneven sheen, recurring stains, peeling, inconsistent coverage, or earlier coating failure. The exact consequence depends on what was missed. A sound surface may tolerate minimal preparation, while an unstable or contaminated surface can undermine the entire project.
How the right preparation supports the finished project
A reliable paint job is not defined solely by a colour chip, a premium label, or a promise of two coats. It starts by understanding the substrate, identifying the real problem, choosing the appropriate repair and preparation steps, and applying a compatible system under suitable conditions.
That is what a prep-first approach means: not doing unnecessary work everywhere, but doing the right work where the surface requires it. A clean wall, a stained ceiling, chalking stucco, damaged trim, and a previously coated deck each deserve different decisions.
If you are comparing contractors, ask them to explain what happens before paint goes on. If you are planning your own project, inspect the substrate and consult the product’s technical documentation before choosing a method. In either case, remember the sequence: preparation → adhesion → finish → longevity.
Learn more about Dynamic Painting, explore our residential painting services and completed painting projects, or request an estimate when you are ready to discuss the actual surfaces in your home.